In Angular, component styles are isolated (a.k.a View Encapsulation◹). That means CSS styles of a component are only affect the component itself, not its parent or child components.
It is helpful because it can prevent CSS styles conflict between parent and child components.
To see why we need it, let’s take a look at the following example.
An example with no CSS Isolation
Let’s say we are not using Angular, but some imaginary UI framework that does not supports CSS isolation. I’m using a JSX-like syntax here only to make the post easier to follow.
We have a program that looks like the following HTML structure:
App
 ┠ div.foo
 ┠ Foo
 ┃  ┠ div.foo
 ┖ Bar
    ┖ div.bar
The Foo component creates a div with class .foo. The Bar component creates a div with class .bar. The App component creates a div of class .foo, as well as load loading the two Foo and Bar components.
In the Foo component, we load a CSS file with the content of:
// foo.style.css
.foo {
    background: red;
}

// foo.tsx
import './foo.style.css';

const Foo = () => (
    <div className='foo'>Foo</div>
)
The same with Bar component, we load a CSS file with the content like:
// bar.style.css
.bar {
    background: red;
}

// bar.tsx
import './bar.style.css';

const Bar = () => (
    <div className='bar'>Bar</div>
)
And the App component loads them all:
// app.style.css
.foo {
    background: blue;
}

// app.tsx
import './app.style.css'
import { Foo } from './foo';
import { Bar } from './bar';

const App = () => (
    <div className='app'>
        <div className='foo'>Foo from App</div>
        <Foo/>
        <Bar/>
    </div>
)
We would have the output like this:
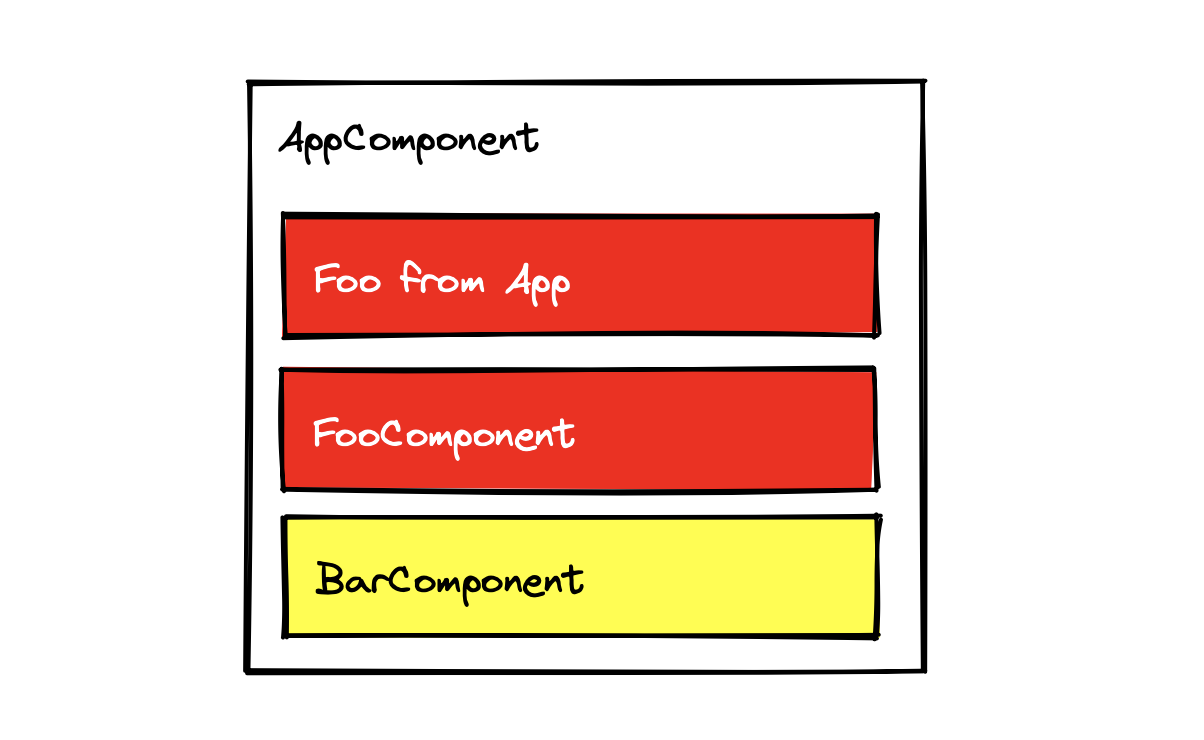
In the App component, although we already define the blue background for .foo, it got overridden by the .foo style from Foo component, the generated CSS styles would look like this:
.foo {
    background: blue;
}

.foo {
    background: red;
}

.bar {
    background: yellow;
}
An example with CSS Isolation
Now, let’s build this example again, this time we are using Angular.
This is how we build the Foo component:
@Component({
    selector: "foo",
    styles: [
    `.foo {
        background: red;
    }`
    ],
    template: `<div class="foo">Foo</div>`
})
class FooComponent {}
And the Bar component:
@Component({
    selector: "bar",
    styles: [
    `.bar {
        background: yellow;
    }`
    ],
    template: `<div class="bar">Bar</div>`
})
class BarComponent {}
And lastly, the App component:
@Component({
    selector: "app",
    styles: [
    `.foo {
        background: blue;
    }`
    ],
    template: `
    <div class="app">
        <div class="foo">Foo from App</div>
        <foo></foo>
        <bar></bar>
    </div>`
})
class AppComponent {}
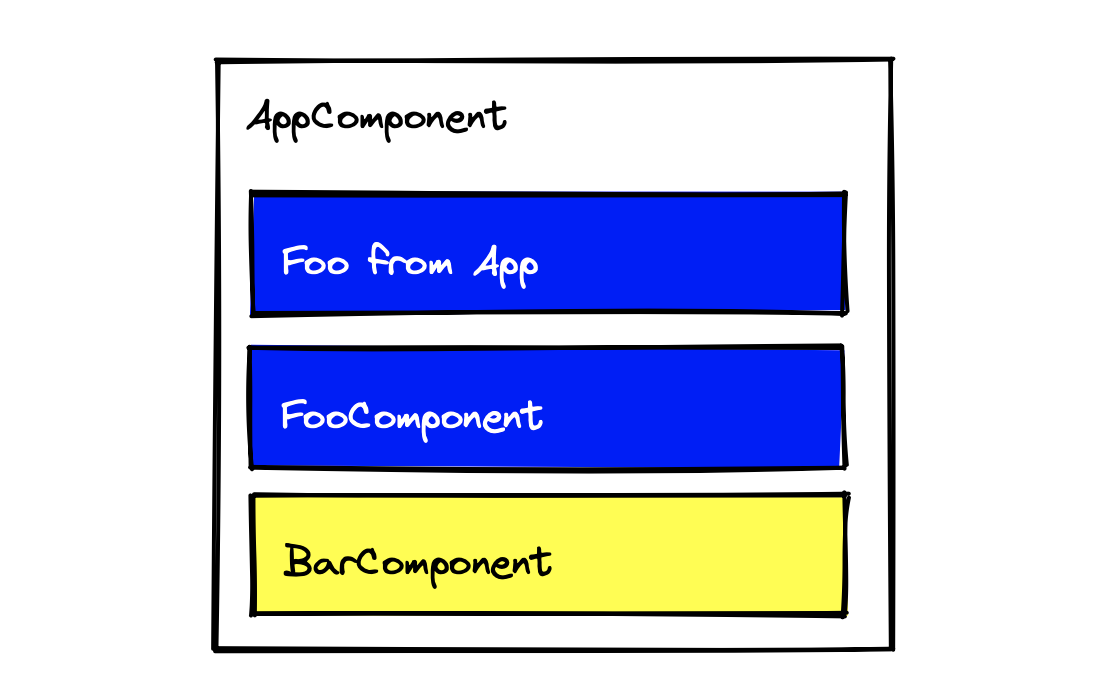
Now, the output would look like this:

The styles are isolated between the components, so, the style of .foo that is defined inside the App component only affects the content of App component. It has no effect on the child components like Foo or Bar. The same with the child components, the styles will never affect its parent’s content.
Even if you force the style for .foo class from App component, nothing will be changed in the Foo component.
.foo {
    background: blue !important;
}
The only way to force the style of child components from the parent component is to use ::ng-deep selector for each rule in the parent:
::ng-deep .foo {
    background: blue !important;
}
How View Encapsulation works?
When creating a component in Angular, we can specify the encapsulation property, with one of the three values:
- ViewEncapsulation.ShadowDom: use the browser’s Shadow DOM API to implement isolation. We will go into the details of this mode in another post.
- ViewEncapsulation.Emulated: Angular modifies the CSS selectors to implement the isolation between views
- ViewEncapsulation.None: disable the CSS isolation for the component
By default or when not specified, the value is ViewEncapsulation.Emulated. To understand how this mode works, let’s look at the generated HTML structure of the above Angular example:
<app _nghost-qwd-c0>
    <div _ngcontent-qwd-c0 class="app">
        <div _ngcontent-qwd-c0 class="foo">Foo from App</div>
        <foo _ngcontent-qwd-c0 _nghost-qwd-c1>
            <div _ngcontent-qwd-c1 class="foo">Foo</div>
        </foo>
        <bar _ngcontent-qwd-c0 _nghost-qwd-c2>
            <div _ngcontent-qwd-c2 class="bar">Bar</div>
        </bar>
    </div>
</app>
Angular appended some attributes to each of the generated HTML elements like _nghost-<id> and _ngcontent-<id>, in which:
- ngHost to identify where the component started
- ngContent is the inner HTML content of each host
For example, with the bar component, we can see that it is the content of _nghost-qwd-c0, which is the App component. At the same time, it is a new host called _nghost-qwd-c2.
The generated CSS would look like this:
.foo[_ngcontent-qwd-c0] {
    background: blue;
}

.foo[_ngcontent-qwd-c1] {
    background: red;
}

.bar[_ngcontent-qwd-c2] {
    background: yellow;
}
By using the custom attributes, Angular is able to isolate the conflict styles selectors between the components.
If we specify the ViewEncapsulation.None to a component, the custom context attributes will not be generated, resulting in a normal-looking CSS styles (only for that component):
@Component({
    selector: "app",
    styles: [
    `.foo {
        background: blue;
    }`
    ],
    ...
    encapsulation: ViewEncapsulation.None
})
Here’s the generated CSS:
.foo {
    background: blue;
}
The same as when we apply a ::ng-deep pseudo-selector for a CSS rule, that CSS rule will be generated as a global scope:
@Component({
    selector: "app",
    styles: [
    `.foo {
        background: blue;
    }

    ::ng-deep .bar {
        color: red;
    }`
    ],
    ...
    encapsulation: ViewEncapsulation.Emulated
})
The generated CSS would be:
.foo[_ngcontent-qwd-c0] {
    background: blue;
}

.bar {
    color: red;
}
The .bar selector is generated at the global scope, so it can be applied to the bar elements in the inner scope.
This is why we should always narrow down the scope of the selector when using ::ng-deep, so it will affect only the child components of your current component.